WordPress is a great tool for managing a website and creating blog posts. It’s the perfect spot to write something you are passionate about or knowledgeable in and share it with an online community within seconds. To add to your compelling written content, images are equally important. We’re here today to explore the ways you can up your WordPress game by learning how to optimize images for WordPress.
WordPress Image Optimization
Have you ever wondered why it’s important to ensure your images are properly exported and optimized? Have you ever considered how long it takes to load a page on your website? Coincidently, the two are connected, and each image added could add to your page loading time. And we all know laggy websites = frustrating.
Why can images slow down a website? This is because each time a user visits your site, they have to temporarily download all images from your server to their computer. While this may not be of any consequence to new sites with little images, you may run into this problem down the road as you begin to add more and more images to go with your blog posts. In any case, you will want to keep load times as fast as possible, otherwise, you risk visitors leaving your site before they see your content. This may also affect things like your Google ranking because Google takes into consideration how long a user spends on your website.
Different Kinds of Image Formats
Before we delve into image optimization, it’s important to distinguish between the two main image formats used in WordPress: PNG and JPG.
JPG
- Stands for Joint Photographic Experts Group
- JPG is typically used in photographs and is the most used image format
- Can store large amounts of colour or data
- Compression of JPG files is permanent
- JPG is optimal for large files such as photographs
PNG
- Stands for Portable Networks Graphic
- Has become an alternative to the GIF file format
- Supports transparency in browsers
- Typically more suited for graphics such as logos with limited colour change
- Non-lossy file, which means it doesn’t lose quality when compressed
- PNG is optimal for graphics that require transparency and scalability
How to Optimize Images Before Uploading
Photoshop
- Once your image or graphic is complete, go to File > Export > Save for Web (Legacy)
- Make sure the correct image format is selected such as JPG, PNG, etc.
- Make sure the “Optimized” box is selected or “Quality” is set to %100 (depending on your version of Photoshop).
- Make sure the image dimensions are correct.
- Make sure image height and width are correct. You can adjust them here.
- You can also add a canvas size (or border) around the image here.
- Make sure “Convert to sRGB” is selected.
- Hit “Export.”
Illustrator
- Once your image or graphic is complete, go to File > Export > Save for Web (Legacy)
- Make sure the correct image format is selected, such as PNG-24 (if you’re working with graphics you will most likely want PNG-24 for the highest quality).
- Checkmark “Transparency” if you want to have a transparent background.
- Make sure the image dimensions are correct. You can adjust width and height here.
- Click “Art Optimized” or “Type Optimized” depending on which you want more optimal. Usually “Art Optimized” is the most common choice.
- Checkmark “Clip to Artboard” if you want just the graphics that are within the artboard to export. If you want everything you created (including the graphics that went over the edges of your artboard), unmark this box.
- Hit “Save.”
It’s that easy 🙂
How to Optimize Images After Uploading
WordPress
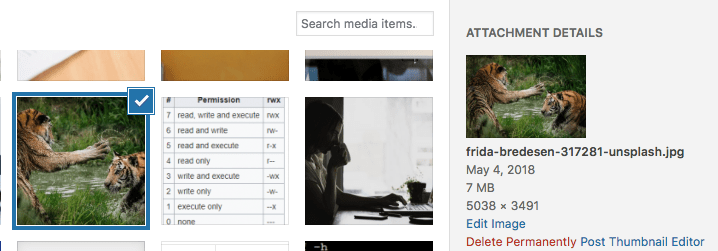
The simplest and easiest way to resize an image after uploading it is to use the WordPress “mini Photoshop” feature. To do so, press the “Add Media” button, located in the top left corner of a blog post.

Once inside, choose an image. If you don’t already have an image you’d like to resize, this is where you’ll be uploading an image. After you have selected the image, find the edit button located just under the selected image.
From here, you can choose how small or big you want your image to be. The smaller it is, the quicker it will load on a page.
Plugins/Tools
If you’re looking to resize an image after you’ve uploaded it to WordPress, you can also do so using a WordPress plugin. One of the best plugins for this is Smush. It compresses and cuts unnecessary data from your images so they take up the least amount of space while providing the best quality.
Additionally, there are several other online tools that may be worth looking at if you’re exporting images in bulk and want a simple method of doing so. Check out some of these options:
Closing Thoughts
Learning how to optimize images is a great way to capture the attention of users, as well as keep your page loading quickly. These tips are easy to follow and even easier to apply to your everyday blog posts.
Do you have any questions about how to optimize images for WordPress? Just let us know in the comments below.


[…] can optimize images before you upload them to WordPress by following proper export […]